Highload Cup 2018 (Tutorial)
Welcome to Highload Cup 2018! This is a tutorial on creating the simplest solution from scratch. After going through all the steps, you can send the first solution and get the first results. In our example, we will make a server on Go and build a Docker container to start it.
1. Creating a web server
For example, let's write a web server on Go that will respond to all requests Hello, I'm Web Server!.
To do this, create a file main.go, in which we write:
package main

import "net/http"

func DumbHandler(writer http.ResponseWriter, request *http.Request) {
    writer.Write([]byte("Hello, I'm Web Server!"))
}

func main () {
    http.HandleFunc("/", DumbHandler)
    http.ListenAndServe(":80", nil)
}2. Building and running a Docker container
Now we compile, build and run our server. You do not need to install anything except Docker.
To createour Docker-container, we need a file called Dockerfile.
Create it in the folder where main.go is located.
The Dockerfile contains directives that are executed when the container is built. It actually describes the state of the system before launch.
Any Dockerfile can be inherited from another Dockerfile, and in our case we will inherit from the file that describes the basic CentOS 7.
We need to download and install Go, compile our main.go and start the server.
You can do it like this:
# Inheriting from CentOS 7
FROM centos:7

# Chosing a working directory
WORKDIR /root

# Installing wget and downloading Go
RUN yum install -y wget && \
    wget https://storage.googleapis.com/golang/go1.8.3.linux-amd64.tar.gz

# Installing Go, creating workspace and project directory
RUN tar -C /usr/local -xzf go1.8.3.linux-amd64.tar.gz && \
    mkdir go && mkdir go/src && mkdir go/bin && mkdir go/pkg && \
    mkdir go/src/dumb

# Setting environment variables for Go
ENV PATH=${PATH}:/usr/local/go/bin GOROOT=/usr/local/go GOPATH=/root/go

# Copying our source file main.go inside the container to go/src/dumb folder
ADD main.go go/src/dumb

# Compiling and installing our server
RUN go build dumb && go install dumb

# Exposing port 80
EXPOSE 80

# Launching our server
CMD ./go/bin/dumb
Starting the server should not happen at the assembly stage, but at the container launch stage, therefore we use the CMD directive. Now we can assemble the container using Docker. Being in the folder with Dockerfile, you need to run in the console:
$ docker build -t dumb .-t dumb adds to the container a tag by which we will refer to it in the future.
The container will be assembled, and it will output to the console everything that commands from the Dockerfile will issue when executed. Now make sure that everything works correctly by running the container locally. We need to connect the port in the container with the port on a real machine.
$ docker run --rm -p 8080:80 -t dumb -p 8080:80 will redirect requests to port 8080 of our machine to port 80 of the container.
-t dumb - access to the container by tag, which we added during assembly.
Now, if you go to the browser at localhost:8080, then we will see "Hello, I'm a Web Server!". Exactly what we wanted!
3. Sending the container with the solution to the testing system
Now the last step is to send a trial solution for verification. To do this, log in to Docker, write down your tag and send your solution.
$ docker login stor.highloadcup.ru
Username: xxxhackerxxx@domain.com                           # your email
Password: 12345678                                          # your secret key from personal profile
Login Succeeded                                             # on highloadcup.ru

$ docker tag dumb stor.highloadcup.ru/accounts/disabled_cat  # disabled_cat - your own
$ docker push stor.highloadcup.ru/accounts/disabled_cat      # repository from task page
Our solution goes through shelling stages one by one.
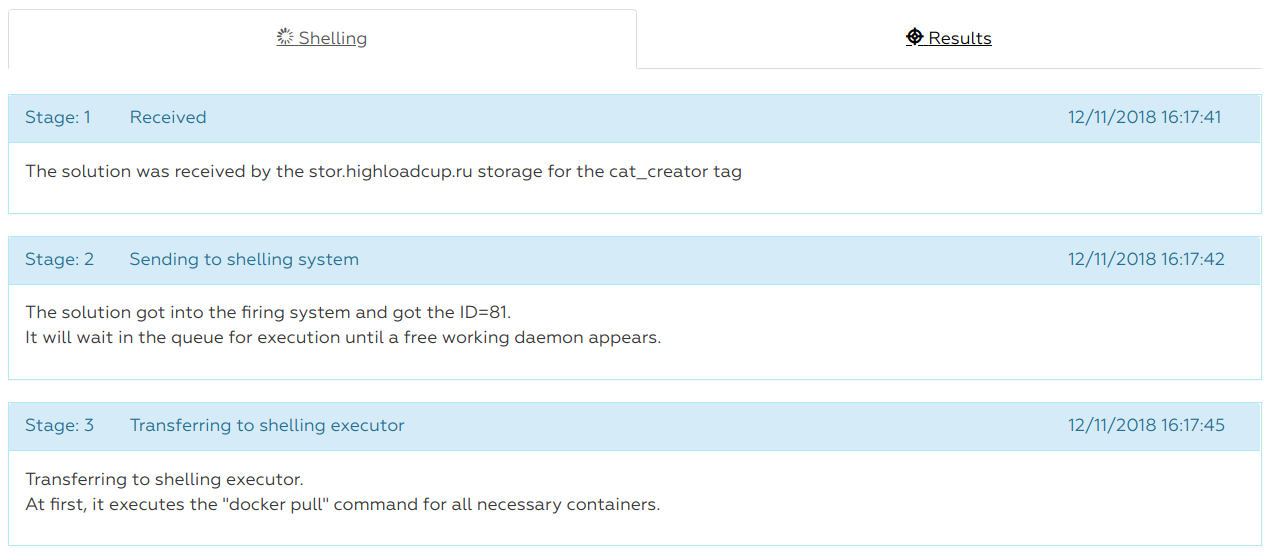
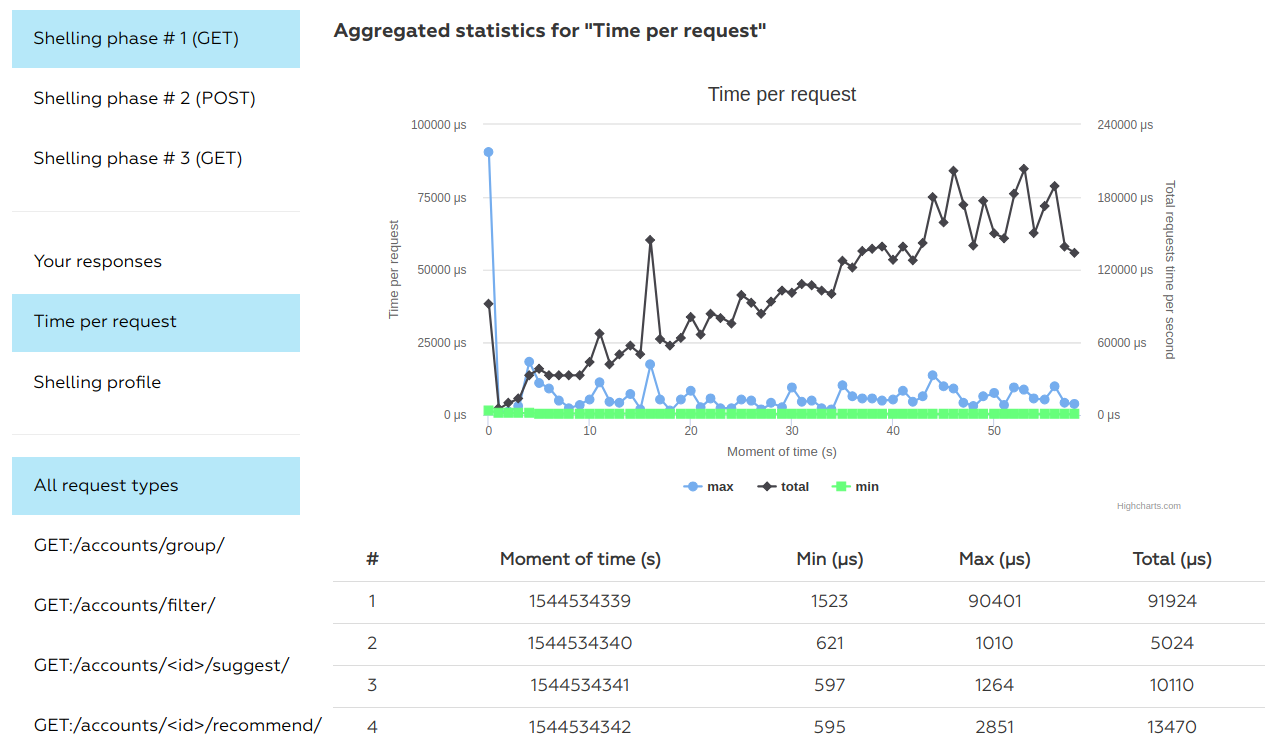
After the end of the trial shelling we see its statistics.
Of course, we will not launch a rating attack on a trial solution. It can be run only 4 times in 12 hours. Let's summarize - now we can create a solution, build a container with it and send it for verification.
That's all you need to get started successfully! Then you can add new components to your Dockerfile (mysql, memcached, python, ruby ...), implement all types of queries, improve performance, balance the load, and whatever you want!